Thursday, July 28, 2016

Coming Up Roses


Happy Thursday! It's time to kickoff your weekend with some bubbly. This is my favorite cocktail recipe and I know that you will love it too!

Ingredients:
1 lime - cut into 6 chunks
1 oz rose syrup
4 oz Bacardi raspberry-flavored rum
Champagne
Rose water
Rose petals

In a cocktail shaker, muddle the lime with rose petals and rose syrup. Add rum and about 1/2 cup of ice. Shake well. Pour into a highball glass and add ice. Top with champagne and rose petals for garnish.

Enjoy!

My highball glasses are from Anthropologie.


Wednesday, July 20, 2016

Stylishly Organized

This week's DIY is another antique transformation. It's amazing what a little Orange Glo and new hardware can do to an old sewing machine drawer. Although I had planned on painting the drawer, once I got it cleaned up, I decided that the modern hardware complemented the distressed wood perfectly! 

Checkout your local antique shop and get yourself some new hardware. All you have to do is clean it up, drill a hole, attach your hardware and you are done! Whether you re-purpose it as a planter or a mail holder, it will surely make a statement! 

I got my hardware from Anthropologie on sale. I'm also kind of obsessed with these knobs:
1. 2. 3.


Tuesday, July 12, 2016

The Golden Beauty


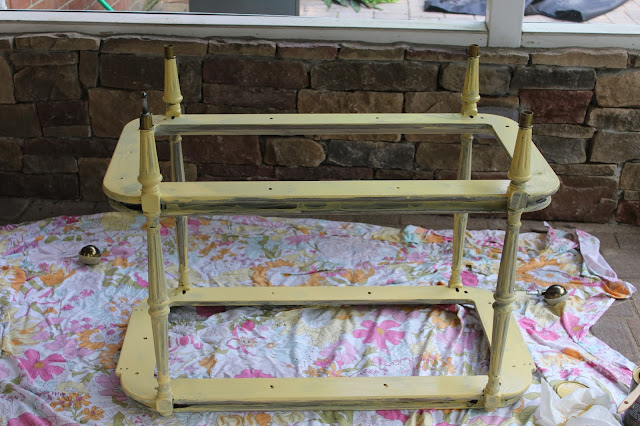
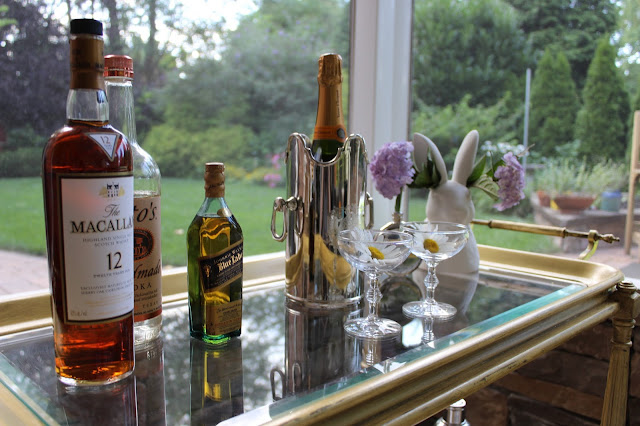
I scored this antique buffet cart for $100 at a hole-in-the-wall hardware store in the Northern Neck. With a little TLC and paint, it was totally transformed into a golden beauty. This DIY is simple: use chalk paint to fully cover the cart (I did three layers), distress with sandpaper, and top it off with three coats of the Golden Glimmer.

Product details: I used Vintiques chalk paint in Buttercup and the Metallic Masters top coat in Golden Glimmer.


Monday, July 4, 2016

Decorate with Wine Barrels


For those of you winos out there, what's a better way to decorate than with wine barrels themselves?! Wedding planning has been on my mind for quite sometime and I have recently decided that I want the overall theme of my reception to be both rustic and elegant. And, let's be honest, what screams elegance and rustic more than wine barrels? From cutting them in half for side tables to garden planters, they are so versatile and timeless.

Ordering a wine barrel can be somewhat pricey, so check with your local vineyards to see whether or not they are selling their old barrels. That's how my mom and I scored four! I plan on eventually using my barrels as cocktail tables and buffet stands for decoration at my reception. However, in the meantime, I've decided to use them as planters. In the pictures below, I styled them with greenery from my garden and peonies. I also styled some yummy Moscow Mules on a wine barrel Lazy Susan (cocktail recipe is below).

Side note: Pots of Silver Drop Eucalyptus normally sit on top of the barrels in my backyard. Eucalyptus is a full sun plant that you will see in many of the loose flower arrangements that you have been drooling over on Pinterest. I can't wait to share my homemade arrangements with you. I'm working on my green thumb and on keeping plants alive for more than a week! :) Stay tuned.

Need inspiration? Check out my Pinterest board for more ways to incorporate wine barrels into your home decor and/or wedding planning.


The Moscow Mule:
Prep It:
- Moscow Mule Mug
- Ice
- 1/2 Cup of Ginger Beer
- 1.5 oz Vodka
- .5 oz Lime Juice
- Lime wedge for Garnish
*Recipe makes 1 cocktail

 Do It:
- Fill your mug with ice. Add vodka, lime juice and ginger beer. Stir.
- Add lime wedge for garnish.

Tuesday, June 21, 2016

YAY

Garlands with tissue tassels and balloons?  This DIY is certainly YAY-worthy. Spice up your next wine night or surprise birthday party with this fabulous garland. Although it may be somewhat time consuming to cut the tissue paper for your tassels, it is t-totally worth it. Plus, it costs less than $15 to make! 


Materials:
Gold balloons
Gold foil tissue
Pink tissue paper in various shades
Scissors
Tape
String

Details:
Step 1 - Fold a piece of tissue paper lengthwise. Then, fold in half widthwise. Fold in half widthwise again. 
Step 2 - Cut your tassel strips from the unfolded end. Make sure you leave about 1 inch from the top of the fold. Your strips can be however thin or thick as you please. Mine are about .5 of an inch wide.  
Step 3 - Unfold once and cut from the top of the fold to the end of the fringe. You should now have three pieces. Two pieces will be smaller than the third. Make sure you cut the third larger piece in half. You should then have four pieces of fringed tissue. 
Step 4 - Once you have unfolded your fringed pieces, begin to roll the tassel along the crease lengthwise. 
Step 5 - Once rolled, begin to twist the center area until tight and make a loop. 
Step 6 - Use your tape to secure the tissue loop in place. 
Step 7 - Repeat steps 1 through 6 until you have the desired number of tassels. 
Step 8 - Cut a piece of string for your garland. Add one tassel at a time. I attached each tassel with a simple knot. Add your balloons as you see fit.
Step 9 - Blow up your balloons with the straw provided and tape the tail to the back of the balloon.

All done! The best thing about the garland is that it is totally reusable. You can pack it away in storage and inflate the balloons again at your next shindig.


Tuesday, June 7, 2016

A Fun TWIST on Pretzels


OMG is right! Who doesn't love a good pretzel? These letter-shaped pretzels are AMAZING and quite delicious. I have never made homemade pretzels before, so it was quite the learning experience. Although my letters didn't turn out 100% perfect, they were still so much fun to make and are the epitome of edible cuteness. If you are looking for a fun project to do with friends, and you have a couple of hours, the pretzel letters are a must!

Cookie cutters - I bought 3" letters from Sur La Table

Pretzel Recipe:
— 1 1/2 cups warm water
— 1 tablespoon sugar
— 2 teaspoons salt
— 4 1/2 cups of flour
— 1 packet of dry yeast
— 1/4 cup butter, melted
— 10 cups water
— vegetable oil
— 2/3 cup baking soda
— 1 egg yolk
— pretzel salt for dusting

1. Pour the warm water, sugar and salt into a mixing bowl. Sprinkle the packet of yeast over the water and let sit for five minutes.
2. Add the flour and the melted butter and mix until the dough is smooth. 
3. Rub another bowl with vegetable oil and place the dough inside. Cover with a towel and place in a warm place. Allow the dough to rise for one hour.
4. Preheat your oven to 450 degrees and grease your baking sheet. Pour 10 cups of water and 2/3 cup baking soda in the pot on the stove and bring to a boil.
5. Place it on a floured surface and use your palms or a rolling pin to flatten the dough to about 1/2-inch thick.
6. Use your alphabet cookie cutters to cut out your desired letters. Place them on the oiled baking sheet.
7. Once the water in the pot has come to a boil, drop in the pretzel dough and leave to sit for 30 seconds. Remove from the water with a slotted spatula and place back onto the baking sheet. Repeat for each letter.
8. In a separate bowl, mix an egg yolk with one teaspoon of water.
9. Brush the tops of the dough and sprinkle with pretzel salt.
10. Place the pretzels in the oven for 9-10 minutes or until browned.

ENJOY!

*Recipe/how-to via Sam Ushiro


Tuesday, May 31, 2016

Flower Power


My mom and I recently took a peony flower arrangement class with the oh-so-talented Holly Chapple, and it was spectacular! I have always called myself a crazy flower lady and this class was right up my alley.  It's amazing how each student was given the same flowers, yet each arrangement was so creative and different. All you need is plastic-coated chicken wire, floral tape, a vase, and flowers/foliage to make this peony masterpiece. If I could create this beauty, you certainly can too!

Holly has recently started offering classes for the community and you can find her schedule of events here. I encourage you to try one out if you can!