Tuesday, March 1, 2016

The Mossy Monogram


Who doesn't love monogram letters? You can use them to personalize any space, whether it be a window sill in your kitchen or a shelf in your office. I was recently wandering through Michael's searching for inspiration and stumbled across these wooden letters from the new Make Market line. Because they had raised edges with a rustic flare, I decided that they needed to be filled with moss. I absolutely love, love, love the way that they turned out. And, to top it off, the letters were 40% off at Michael's!

Instead of letters, I am now on the hunt to find similar wooden numbers. For all you ladies out there planning weddings, these would make for the perfect table numbers if you are going for a rustic/vineyard look.

Supplies:
  • Hot glue gun
  • Moss
  • Wooden Letters
  • Newspaper
Moss Magic:
  • Prep you surface. I suggest using newspaper, as the moss can get a little messy. It just makes it easier to cleanup once you are done. 
  • Apply hot glue and press in moss. Work in small sections so that the glue doesn't harden too quickly and your moss adheres. 
All done! This craft literally took me 20 minutes to make. If you want to make a hostess gift on the fly for your next dinner party, this is your craft simple and thoughtful. 


Tuesday, February 23, 2016

Velvet Queen


Katie Kime is my design muse. I discovered her on social media over a year and a half ago and have been girl crushin' hard ever since. Like me, she is a lover of all things bright, white, gold and lucite. Her designs and accent pieces are bold and add character to any space. SHE IS A DESIGN GODDESS. Make sure you checkout her website.

When I decided to move into a one-bedroom last year, I realized that I had absolutely no living room furniture and not a big budget to buy new stuff. With the help of my crafty mother, I decided to refurbish my grandmother's couch and other hand-me-down pieces that I had received from friends or found on my neighbor's curb on trash day. The results? A living room filled with revived antiques, bright velvet, white lacquer and lucite/gold accents.

Marcelo Montgomery did all of my upholstery and he is absolutely amazing! Although I ordered all of the fabric for my pieces, he is the one that truly brought them back to life. If you have furniture that needs a little TLC, send it to him. The man can work wonders!

Furniture Makeover Details:


It's okay to dream, right? One day, these will be mine:


One. Two. Three. Four


Tuesday, February 16, 2016

Tea Party Animal


I have a serious love affair with tea! While some people collect coins or stamps, I am a collector of tea sets, old and new. To me, there's something elegant about the English tradition of afternoon tea. It's the perfect excuse to dress up and socialize.

Host a tea party for your girlfriends (or your child's birthday) on a budget! All you need is tea, dainty sandwiches and/or cakes and pastries to make for the quintessential afternoon tea experience. Little girls (and adult women) would jump at the opportunity to wear big hats and long gloves.

I recently had a tea party for two (me + my fiancé). He certainly wasn't as excited about the tea party as I was, which is completely understandable. :) See how I styled my tea party for two below and checkout the links to my favorite tea related accessories.


One. Two. Three. Four. Five.


Tuesday, February 9, 2016

Mason Jar Crafts for the Animal Lover


Who ever thought desk organization could look this cute? This DIY is super simple and is a creative way to re-purpose your old mason jars. Whether you fill the jars with loose change or candy for a party favor, the animal lid toppers are surely going to create a stir, as in DIY envy.

Supplies:
Get Crafting:
  • Apply adhesive to the inside of the canning band and press the lid down firmly. 
  • Allow the lid to fully dry for about 10 minutes. 
  • Apply adhesive to the feet of the plastic animals and secure them to the center of the lid. 
  • Allow the lids to dry for another 10 minutes. 
  • Pick a ventilated area and spray your jar toppers. I did about 3 or so coats with about 10-15 minutes in between. Once you have the coverage you desire, spray the top with the Krylon Crystal Clear paint in order to protect the paint from chipping. Tip: Make sure to spray from a bottom angle so that you can fully cover the underbelly of the animals. 
  • That's it! You now have made the cutest desk accessories in your office. Your coworkers will want you to make them one too!


Tuesday, February 2, 2016

Creative Cupid


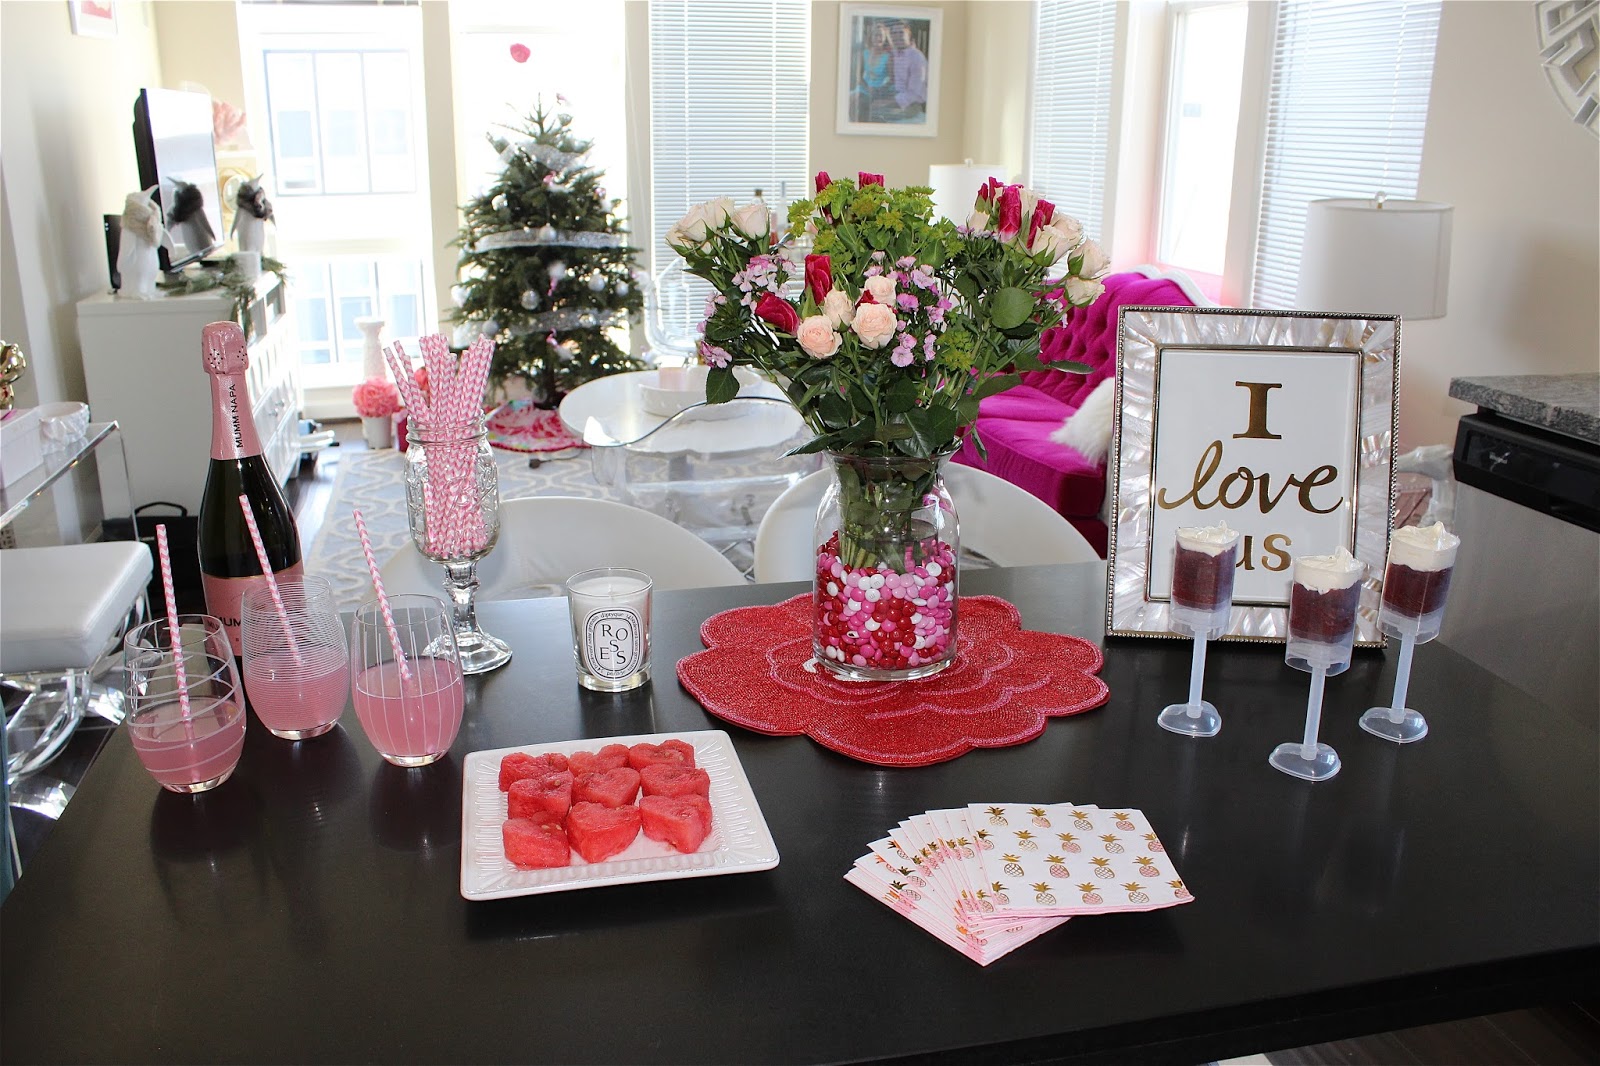
With Valentine's Day just around the corner, I thought it was only appropriate to share some super easy DIY ideas for your Valentine's (Galentine's) festivities. Think pink and creatively: red velvet push pops, heart-shaped watermelon snacks, homemade flower arrangements, pink lemonade, cosmos, ring pops. The list could go on, and on, and on.

The M&M Showstopper 

When it comes to flowers, I think that the arrangements sold online are too expensive on Valentine's Day. You can make your own beautiful arrangements by going local or visiting your neighborhood grocery store. 
  • Two bags of Valentine's Day M&Ms
  • Flowers of your choice
  • Two clear vases (make sure the smaller one is cylinder and fits inside your larger vase)
  1. Place the small cylinder vase in the larger vase.
  2. Cut the corners of the M&M bags and begin to fill around the small vase.
  3. Once the vase is filled to your liking, use a separate cup to fill the small vase with water.
That's it! The arrangement makes for the perfect centerpiece.


Crazy for Watermelon

What screams pink more than watermelon? This is probably the easiest party food I have ever made, and, to top it off, it is adorable and cheap.
  • Watermelon slices 
  • Cutting board
  • Heart-shaped cookie cutter


The Push Pop

Growing up, I was obsessed with the Flintstone push up pops. When I stumbled across these heart-shaped push pop containers, I died. They are amazing! You can fill them with anything, from ice cream to daiquiri mix. Naturally, it seemed fitting to fill them with red velvet cake.
  1. Bake your red velvet cake. 
  2. Fill the push pop container about halfway with cake and use the heart plunger included in the package to compress the cake. Repeat this step until you have about half an inch of container space remaining. 
  3. Fill your large Ziploc bag with cream cheese frosting and cut one of the bottom corners (I didn't have an icing kit so I had to improvise).  
  4. Frost your push pops.


Tuesday, January 26, 2016

Pair Your Oysters with Pearls


I don’t know about you, but I am an oyster fanatic! My mom and I were recently out at dinner and, per usual, I ordered a dozen oysters. The wine was flowing and, oddly enough, we got to talking about oyster crafts. We decided that the shells were beautiful and had the potential to be repurposed as a jewelry dish or candle holder. And so, that is exactly what I set out to do. Now to the important stuff: learn how I recycled my shells.


Prep Them!
  1. Eat some oysters (Bluepoints are my favorite!)
  2. Take the shells home (the waiter may look at you a little funny when you ask for a doggy-bag, but who cares!)
  3. Run your oysters under hot water and use a toothbrush and/or scouring pad with soap to scrub the oysters clean
  4. Fill a large Ziploc container with half parts white vinegar and half parts water
  5. Allow the oyster shells to soak in the vinegar water for 24 hours
  6. Pour the vinegar water out and repeat Step 3
    • My oysters still had somewhat of a fishy smell, so I decided to soak them in bleach water for a couple of hours. I wouldn’t recommend bleaching them for too long, as you don’t want the oyster shells to deteriorate.


Paint Them!


    1. Spray the outside of the shell with Rust-Oleum Metallic Gold. I did two coats. 
    2. To paint the top edge of the oysters, I sprayed the Ziploc lid with paint (until it made a little puddle) and used a small paintbrush to apply the paint to the areas that I wanted covered. 
    3. Seal the outer shell with Rust-Oleum Clear spray paint. I did one coat. 
      • Optional: I wanted to leave the inside of the shells natural, but you could also mix things up and hand paint the inside of the shell with liquid gold leaf and leave the outside natural. The possibilities are endless. 
    4. Add some jewelry or a tea-light candle and voila!