PAPER. RIBBONS. Need I say more? My mom taught me how to make these in college and I have been making them like crazy ever since. You can use them to accessorize your office bulletin board or to up your gift wrapping game. The possibilities are endless.
Supplies:
- Scrapbook paper
- Cupcake wrappers
- Hot glue gun
- Liquid glue
- 3/8" ribbon
- Paper trimmer
- Hammer
- Scissors
- Mini tart pan - Bed Bath & Beyond also sells them individually in-store
- Rose accessory
- Pearl embellishment
- Sizzix machine
- Paper rosette die
- Paper crimper
- Circle punch
- Doily
Instructions:
- Flatten your tart pan. Turn the tart pan upside down and hammer until flat.
- Cut your scrapbook paper. Using your paper trimmer, cut three strips of scrapbook paper 3/8"-5/8" in width.
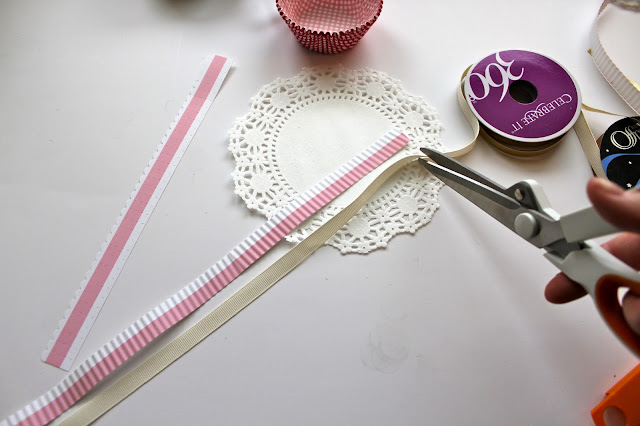
- Cut two 3/8" ribbon strips to match the length of your paper strips.
- Crimp your paper strips. Place one end of the paper strip in between the crimper and begin to turn the handle. Continue to turn the handle until the strip is fully crimped. This adds a nice dimensional effect.
- Cut a piece of paper to fit the rosette die. Place the paper in between the die and the cutting pad. Place the sandwiched paper, die and cutting pad onto your Sizzix machine. Turn the handle on the machine and continue to turn it until the die has passed through the rollers. Your die-cut shape is ready! If you can't figure out how to use the machine, this instruction manual is super helpful.
- Remove the excess paper from your die-cut shapes. I used the larger die-cut shape for my ribbon.
- Fold the paper back and forth along the perforated lines. Your piece of paper should look like an accordion.
- Adhere the ends of the accordion die-cut shape with liquid glue. It should look like a bottomless cupcake wrapper.
- Cut 2 paper circles with your paper punch.
- Place your fingers on the inside of the die-cut shape and push out and up. It should look somewhat like a windmill. Keep your finger in the middle of the shape to keep it from losing its form. Apply glue to one of your paper circles and adhere it to the top of the die-cut shape. I suggest holding your finger there until the glue has sufficiently dried. If not, the paper won't hold and it will revert back to the bottomless cupcake wrapper.
- Turn the shape over and adhere the second paper circle to the middle.
- Flatten a cupcake wrapper. Apply hot glue to the back of your flattened tart pant and adhere to the wrapper.
- Apply hot glue to the back of the die-cut shape and secure it to the middle of the tart pan.
- Adhere the paper strips and ribbon to the middle of the doily with hot glue.
- Adhere the cupcake wrapper to the doily.
- Embellish. I used hot glue to add a rose accessory to the middle of the die-cut shape and I used pearl borders to add dimension to my cream ribbon. You can go crazy with embellishments, so get creative!


No comments:
Post a Comment