Tuesday, January 17, 2017

Wedding Details - Social Media


Well HELLO 2017! It has been awhile since my last post! Life and the holidays caught up with me and, unfortunately, DIY projects took a backseat (sigh). I am super excited for what 2017 has in store and I can't wait to share some DIY fun with you!

Wedding details have been on my mind A LOT recently (only 135 days to go - YAY!) and I thought it was about time that I share some DIY decor ideas with you.  There truly are SOOOO many budget friendly decorations that you can make on your own!

Today, I'm focused on the incorporation of social media elements in your reception design. Everyone knows that in today's day and age social media plays a big role in documenting wedding festivities, from Snapchat to Instagram and Facebook. So, come up with a good hashtag! It's okay if it's corny, as long as it is special to you!

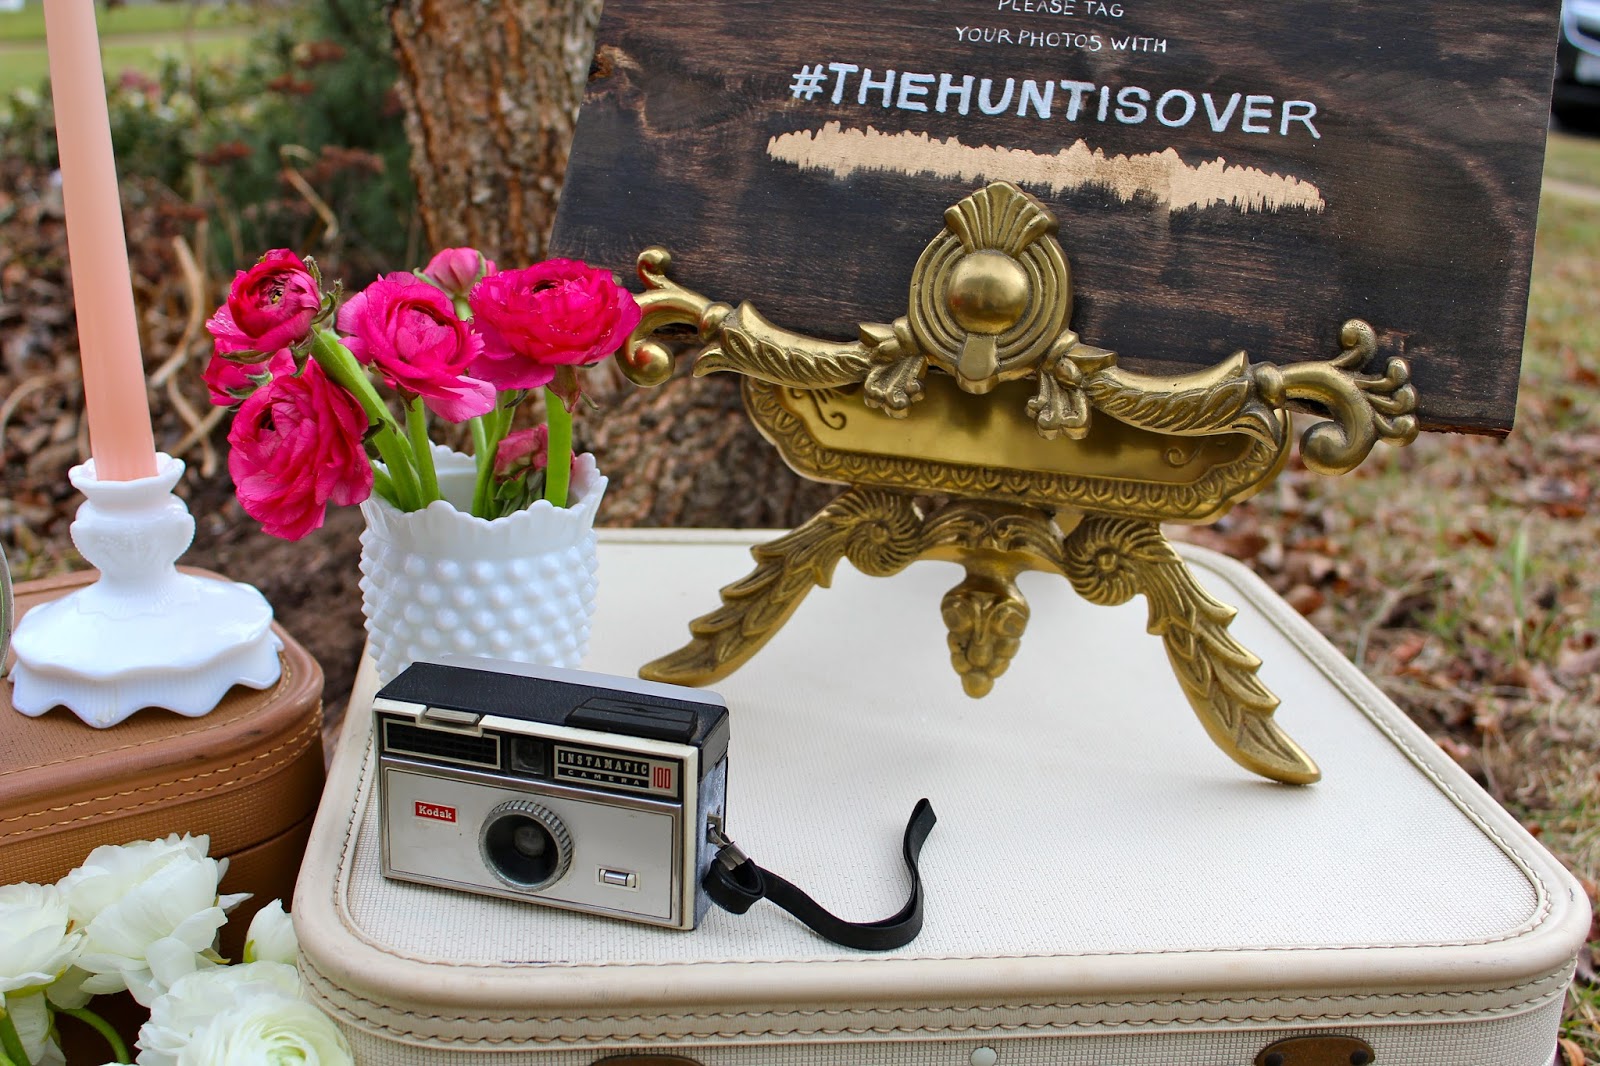
Once you've picked your hashtag, you have to start to think about how you would want to visually capture the attention of your guests so that they remember to incorporate your wedding hashtag in their social media posts. Given that the overall theme for my wedding is rustic/elegant, I thought that a display of vintage cameras, suitcases, small floral arrangements, and a DIY sign (of course) was a creative way to "advertise" my hashtag, see DIY details below.

Wedding Snapchat filters are also a fun and cheap way to incorporate social media! You can find so many great filter designs on Etsy that range anywhere from $10 to $25. Whether you purchase your design or create your own, all you have to do is submit it to Snapchat, pay a nominal fee and viola! All of your tech-savvy guests will love it!

Materials:
Transfer paper
Printer
Pencil or Pen
Tape
Paint Pen
Wood Stain - I used dark walnut
Foam Brush
Wood Slab - mine is from Michael's

I messed up the "and help us capture the love" part of my sign and ended up just covering it up with some liquid leaf. You can always fix your mistakes!!

  1. Stain your wood slab. I would allow for 24 hours of dry time. My wood slab wasn't exactly dry, so I got stain all over my arm and the transfer paper didn't work as well. :( Learn from my mistake.
  2. Create your sign wording in Microsoft Word or PowerPoint. Print. 
  3. Cut a piece of transfer paper that fits over the surface of your sign and tape down the corners. 
  4. Place your sign print-out on top of the transfer paper and tape down to secure. 
  5. Trace over the letters with a pencil or pen. Make sure to apply enough pressure so that the transfer paper works properly. 
  6. Remove the transfer paper and begin to trace the letters with your paint pen. (I did 2-3 coats)
You now have a Pinterest-worthy sign!  This DIY is quite the forearm workout, so you'll need to pour yourself a glass of wine after. Cheers to being #creative!


Sunday, December 4, 2016

Decorating for the Holidays


It's hard to believe that it is already December! Where has the time gone?!?  This year has been amazing and I certainly know that I have a million things to be thankful for. Between getting engaged to the love of my life and buying my first home, 2016 has been a year full of surprises!

The holidays call for lots of decorating, wrapping, parties, and cocktails. Everything I LOVE! I wanted to share a couple of my Christmas decorating tips/ideas that hopefully will help generate your own creative ideas.

Faux Flowers & Ribbon: Attacking the Christmas tree decorating can be a task and it's expensive,  especially if you don't have a large collection of ornaments. I suggest using faux flowers and wired ribbon to decorate your tree. Both tree accessories are great fillers and you can get them on super sale at Michaels. This year, I went with a PINK theme, as expected. I used faux pink poinsettias, roses and gold leaves and ribbon.

Mistletoe: Although you should hang mistletoe in a walkway where you can easily steal smooches from your beau, it is sometimes annoying to have it in an area where you constantly bump into it. Instead, tie it to the bottom of a chandelier. I tied mine on the chandelier over our dinner table and it looks great! No holes in the wall, which makes everyone happy! 

Railing & Mantles: Get yourself some pine roping. I promise it will "Christmasfy" your mantles and rails. Plus, it's cheap. I got 30' of rope for $15. Add some lights/candles and viola! I also love filling clear glass containers and/or large mason jars with pine cones, which will add a festive flair to any mantle or side table. Between the pine roping, real Christmas tree and cinnamon pine cones, my house currently smells like an amazing holiday candle from Yankee that has been burning non-stop for days. I LOVE IT!

Wrapping: Once you've picked a theme, whether it be traditional or blush/gold/green (my favorite combo), try to coordinate your wrapping paper and ribbon accordingly. To me, presentation goes a long way. I love the over-the-top bows and crazy patterned paper. It can be somewhat pricey, so I always buy wrapping paper after the holidays are over to stock up for the next year. 


In going through my old photo albums, I found pictures from last year of my apartment and family home decorated for Christmas! Hopefully these give you even more decorating inspiration. :)

Monday, November 28, 2016

Snail Mail


With the Holidays right around the corner, I'm sure that you will be writing and sending a number of cards to friends and family. Why not make them beautiful?!? I'm a firm believer that all mail should be thoughtful and I tend to put a lot of effort into anything I send. Unique stamps, colorful envelopes/liners and calligraphy go a lonnnnng way. Although some people may throw it out, I'm one of those crazy paper ladies that hangs on to letters FOREVER. I guess I like to reminisce.

Although these envelope liners look super fancy, they are very easy to make and will dress up your letters in minutes. You better find a local Paper Source and a pen pal fast because these liners are AMAZING!

Details:
All products used in this post are from Paper Source. :)
- Tape runner
- Envelope liner template kit

  1. Grab some envelopes and papers to use for the liners. 
  2. Trace around the envelope liner template on the back of the paper you selected for your liner.
  3. Cut. 
  4. Insert your liner into the envelope and run your tape runner along the back edges of the liner's top flap. 
  5. Fold the envelope flap down (like you are sealing the envelope). This will allow for the liner to adhere to the back of the flap. 
You now have the prettiest mail in town!

In case you were searching for gifts for your pen pal or that overly "organized" friend, here are some of my favorite desk accessories!


Sunday, November 20, 2016

Sip & Craft with Jefferson Lane and 116 King


I am SOOOOOO excited to finally share a collaboration and DIY event with 116 King Pop-Up Shop and the Skinny Dip Nantucket. The new pop-up shop in Alexandria officially opened its doors on November 10th and I couldn't be more pumped about it! The store is absolutely darling and offers a diverse array of products for men and women with a focus on up-and-coming designers with New England ties. Some of the amazing brands they carry, to name a few, include Artemis (unique handmade loafers and smoking shoes), Crab and Cleek (cutest tote bags - I actually own a couple), and High Cotton Ties.


Sara Rossi, one of the co-founders of the Skinny Dip Nantucket, certainly has an eye for style! Not only is she a fashionista, given she started her own bag company (Beau & Ro), but she also has some great tips for styling your home on a budget!


"Here are a few of my favorite cost-saving tips that I’ve learned over the years: 
  • COWHIDE RUGS: Go directly to a leather store to buy cowhide rugs, they’re at least half the price than buying through a retailer!
  • FLOWERS: Don’t be afraid of faux flowers. Brands like NDI create high-end stunning silk flowers that look so real, and the best part is… they never die! 
  • FRAMING: Framing a large photo or piece of art with a custom frame can be so expensive.  Instead, go to the framer and ask to see their secondhand, pre-made or unused frames. It’ll be less than a custom frame and they can cut the mat to make your photo fit perfectly."
                  • Sara Rossi 

The DIY class will be held at the 116 King store on December 10th from 4-6 PM. We will be making agate napkin ring holders and leather tassel key chains, my two favorite projects. These are perfect gifts for the holidays and you don't need to be an expert DIYer to participate. I cannot wait to share an evening of crafting with you!  Oh, and did I mention that festive cocktails will be served? Get ready. It's going to be amazing! Sign-up for the class here!


Thursday, November 17, 2016

Pomegranate Martini


I don't know about you guys, but these past couple of weeks for me have been exhausting and grueling. And, because of that, I figured that we could all use a cocktail, or two.  Enjoy this Bond style martini shaken, not stirred. If you try the recipe, let me know! I promise there is a whole lot of festive flavor in this cocktail and it won't disappoint!

1/3 cup of POM Juice
1/2 lime, squeezed
2 shots of vodka
2 shots of orange liqueur
Rosemary for garnish

Combine POM, vodka, lime juice, and orange liqueur in a shaker. Shake. Pour. Garnish. Serve. It's that easy! :)

Details: Martini Glasses. Cocktail Shaker.